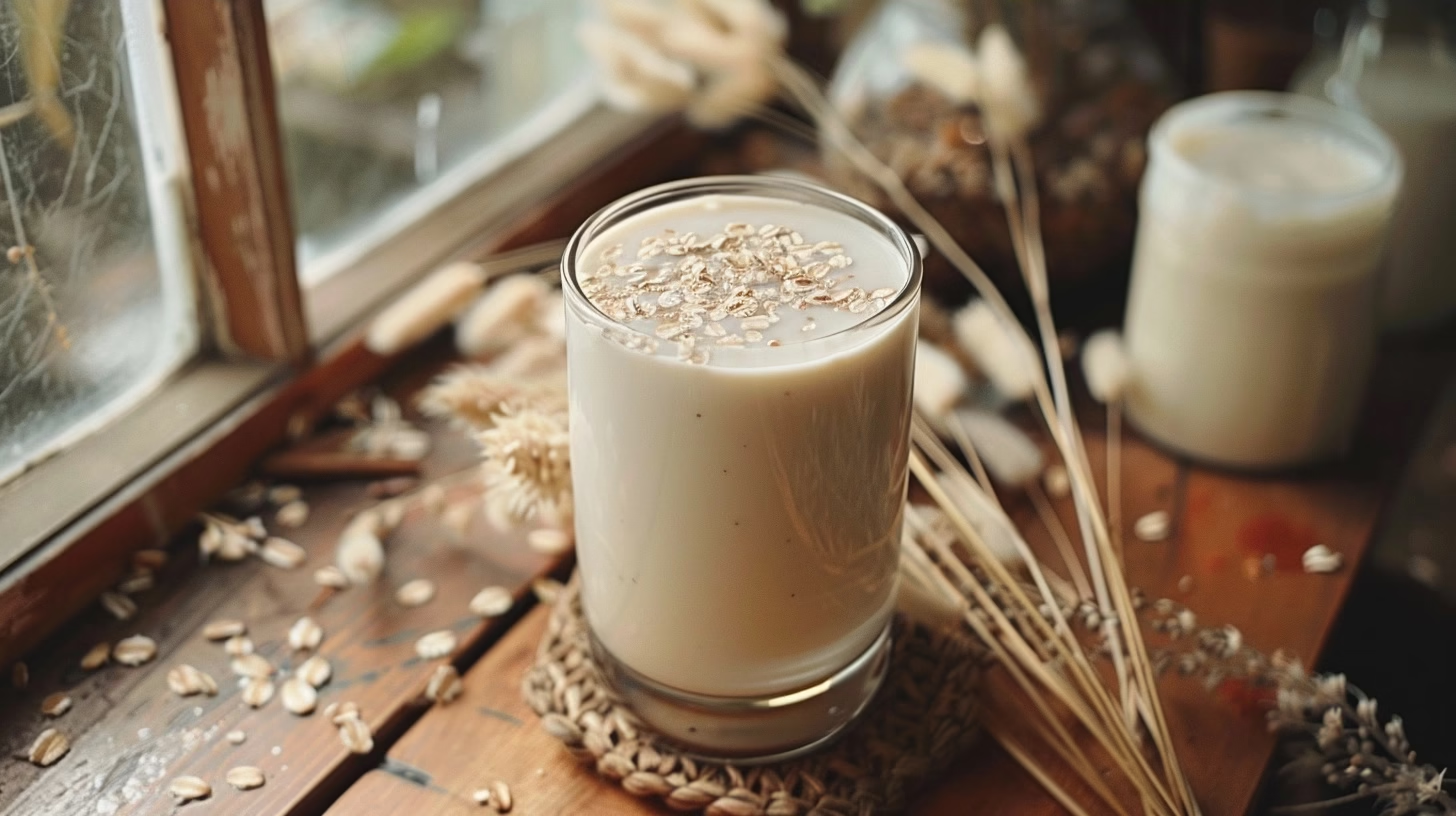
Homemade vanilla oat milk is a smooth, naturally sweet plant-based beverage you can prepare in just five minutes using rolled oats and filtered water. This dairy-free milk alternative offers a creamy texture that rivals store-bought options while costing a fraction of the price. Making your own vanilla oat milk puts you in complete control of ingredients, sweetness levels, and flavor intensity. Unlike commercial versions packed with additives and preservatives, homemade vanilla oat milk delivers pure, wholesome nourishment straight into your morning coffee or breakfast bowl. You’ll discover that this simple recipe transforms basic pantry staples into a luxurious beverage that your entire family will love.
Table of Contents
Homemade Vanilla Oat Milk: Creamy Plant-Based Beverage
A naturally sweet, dairy-free oat milk made in 5 minutes with rolled oats, water, and vanilla. Perfect for coffee, cereal, or baking with a velvety texture and wholesome nutrition.
- 1/2 cup rolled oats
- 2 cups filtered water
- 1/2 teaspoon pure vanilla extract
- Pinch of salt (optional)
Combine rolled oats, water, and vanilla extract in a blender.
Blend on high speed for 30-45 seconds until fully dispersed.
Strain mixture through a fine-mesh sieve into a container.
Stir in salt if using.
Store in an airtight container in the refrigerator.
For extra thickness, blend longer or add 1-2 ice cubes
Sweeten with maple syrup or dates if desired
Use within 2-3 days for freshness
Nutritional Information
Understanding the nutritional profile of homemade vanilla oat milk helps you make informed dietary choices. The following approximate values represent one 8-ounce serving of this creamy plant-based beverage.
| Nutrient | Amount per Serving |
|---|---|
| Calories | 68 kcal |
| Protein | 2.3g |
| Fat | 1.5g |
| Carbohydrates | 12g |
| Dietary Fiber | 2g |
| Sugar (Natural) | 0.5g |
| Sodium | 45mg |
| Calcium | 15mg |
| Iron | 0.8mg |
These values apply to unsweetened homemade vanilla oat milk. Adjusting sweeteners or adding extra vanilla will modify the nutritional composition slightly.
Why This Recipe Works
I’ve tested dozens of plant-based milk recipes over the years, and homemade vanilla oat milk consistently delivers superior results for several compelling reasons. The combination of rolled oats and filtered water creates a naturally creamy base that doesn’t require gums or thickening agents. Oats contain beta-glucans, a soluble fiber that naturally thickens the mixture while providing subtle sweetness and a velvety mouthfeel. When you blend oats with water at high speed, you extract maximum creaminess without the grainy texture that plagues poorly executed oat milk recipes.
The vanilla component elevates this simple beverage from functional to genuinely delicious. Pure vanilla extract or whole vanilla beans add aromatic complexity that makes your homemade vanilla oat milk taste like a carefully crafted café beverage. Unlike commercial versions that sometimes taste artificial or overly processed, your homemade version maintains clean, recognizable flavors. I appreciate how this recipe scales effortlessly for one person or an entire family, making it practical for any household size.
Cost efficiency represents another major advantage of making homemade vanilla oat milk at home. A single batch costs approximately 50 cents to produce, while store-bought oat milk typically costs 3-5 dollars per carton. Over the course of a year, regular homemade vanilla oat milk consumption saves families significant money without sacrificing quality or taste. You control every ingredient, eliminate unnecessary packaging waste, and enjoy superior flavor that you simply cannot purchase commercially.
Ingredients
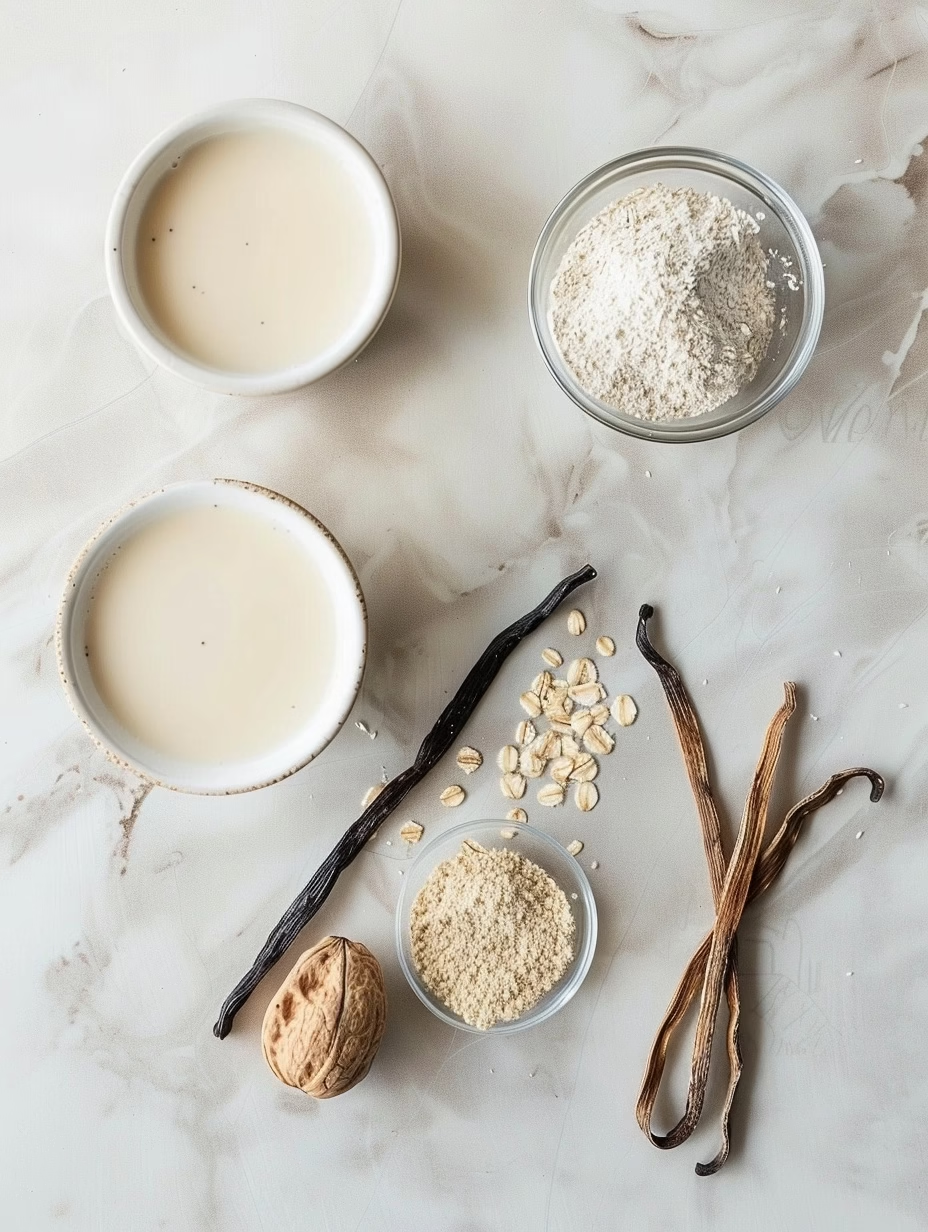
Gather these simple, whole-food ingredients to create your own batch of homemade vanilla oat milk. Each component plays a specific role in developing the final flavor and texture profile.
| Ingredient | Quantity | Notes with Alternatives |
|---|---|---|
| Rolled Oats | 1 cup | Use certified gluten-free oats if needed. Quick oats work but create slightly grainier texture. Steel-cut oats require longer blending. |
| Filtered Water | 4 cups | Filtered water prevents mineral taste. Spring water works well. Tap water acceptable but may affect final flavor. Use 3.5 cups for creamier consistency. |
| Pure Vanilla Extract | 1 teaspoon | Split one vanilla bean and scrape seeds for premium flavor. Use 0.5 teaspoon of vanilla powder as alternative. Avoid imitation vanilla for superior taste. |
| Sweetener (Optional) | 1-2 tablespoons | Maple syrup adds depth. Agave nectar provides mild sweetness. Honey works but isn’t vegan. Stevia offers zero calories. Brown sugar creates slight molasses notes. |
| Sea Salt | Pinch | Enhances vanilla flavor and balances sweetness. Pink Himalayan salt adds subtle mineral complexity. Omit if on sodium-restricted diet. |
Chef Tips for Perfect Results
These expert strategies ensure your homemade vanilla oat milk turns out perfectly creamy and delicious every single time.
- Choose the Right Oats: Use old-fashioned rolled oats rather than instant varieties. Instant oats contain finely ground particles that can make your oat milk taste pasty or chalky. Rolled oats maintain better texture and body when blended into creamy homemade vanilla oat milk.
- Blend at High Speed: Run your high-speed blender on maximum setting for a full 60-90 seconds. Shorter blending times leave gritty particles suspended throughout your oat milk. High-speed blenders like Vitamix or Ninja create the smoothest, creamiest results.
- Strain Properly: Use a fine-mesh strainer lined with cheesecloth or a nut milk bag for optimal results. Straining removes excess pulp while maintaining the beneficial beta-glucans that provide natural creaminess. Do not squeeze the bag aggressively, as this releases bitter compounds.
- Use Filtered Water: Tap water containing chlorine or minerals can impart unwanted flavors to your finished homemade vanilla oat milk. Filtered or spring water provides a clean canvas for vanilla and oat flavors to shine through clearly.
- Chill Before Serving: Cold homemade vanilla oat milk tastes noticeably creamier than room-temperature versions. Chill for at least two hours, or prepare your batch the night before to enjoy maximum flavor development and optimal texture.
- Shake Before Each Use: Natural separation occurs with homemade vanilla oat milk because you’ve excluded stabilizers and emulsifiers. A vigorous shake redistributes oat particles evenly throughout the liquid, ensuring consistent texture and flavor in every pour.
Step-by-Step Instructions
Follow these precise steps to transform simple ingredients into smooth, satisfying homemade vanilla oat milk.
Preparation Phase
- Measure one cup of rolled oats using a dry measuring cup, leveling the top with a knife for accuracy.
- Pour four cups of filtered water into your high-speed blender pitcher.
- Add the measured oats to the blender, followed by one teaspoon of pure vanilla extract.
- Sprinkle in a pinch of sea salt to enhance vanilla flavor and natural sweetness.
- Add your chosen sweetener (one to two tablespoons maple syrup, agave, or alternative) if desired.
Blending Phase
- Secure the blender lid firmly to prevent splashing during high-speed processing.
- Start the blender on low speed, gradually increasing to high speed over five seconds.
- Blend at maximum speed for 60 to 90 seconds until the mixture becomes completely smooth and creamy.
- Watch for consistent color throughout the mixture with no visible oat particles.
- Stop blending and listen for the motor to reach steady speed, indicating proper emulsification.
Straining Phase
- Position a fine-mesh strainer over a large bowl or measuring cup.
- Line the strainer with cheesecloth or place a nut milk bag inside for maximum efficiency.
- Carefully pour the blended mixture through the prepared strainer into the bowl below.
- Allow gravity to pull the liquid through naturally without forcing or squeezing the solids.
- Discard the remaining oat pulp or save it for baking recipes and oat-based dishes.
Finishing Phase
- Pour your freshly strained homemade vanilla oat milk into clean glass bottles or jars.
- Refrigerate immediately for at least two hours before consuming for optimal flavor development.
- Shake well before each use to redistribute any natural separation that may occur.
- Enjoy your homemade vanilla oat milk in coffee, cereal, smoothies, or simply as a cold beverage.
Common Mistakes to Avoid
Understanding these pitfalls helps you create perfectly creamy homemade vanilla oat milk on your first attempt.
Mistake 1: Using Instant Oats Instead of Rolled Oats
Why this happens: Instant oats seem convenient and blend more quickly into homemade vanilla oat milk. However, instant oats are pre-cooked and broken into fine particles, which absorb excess water and create a pasty, thick texture rather than smooth creaminess. How to fix it: Always purchase old-fashioned rolled oats labeled as such on the package. These maintain their structure during blending and produce superior texture in your finished oat milk.
Mistake 2: Blending for Too Short a Duration
Why this happens: Many people underestimate the time required to properly emulsify homemade vanilla oat milk, stopping their blender after just 30-45 seconds. Insufficient blending leaves chunky oat particles suspended throughout, creating grainy texture and separation problems. How to fix it: Blend your mixture for a full 60-90 seconds at maximum high-speed setting. The extra time ensures complete emulsification and maximum creaminess.
Mistake 3: Squeezing or Pressing the Strainer Vigorously
Why this happens: Attempting to extract every last drop of liquid by squeezing the nut milk bag forces bitter compounds from oat particles into your finished homemade vanilla oat milk. This aggressive squeezing creates an unpleasant astringent taste. How to fix it: Allow the milk to drip through naturally using gravity alone. Be patient and resist the urge to press or squeeze the strainer bag.
Mistake 4: Using Non-Filtered Water
Why this happens: Tap water containing chlorine, fluoride, or minerals can impart subtle off-flavors that become pronounced in homemade vanilla oat milk. These flavors compete with delicate vanilla notes. How to fix it: Invest in an inexpensive water filter pitcher or use bottled spring water for superior flavor clarity in your finished oat milk.
Mistake 5: Storing Without Shaking Before Use
Why this happens: Natural separation occurs in homemade vanilla oat milk because commercial stabilizers are absent. Some people assume their batch has gone bad when the liquid separates from suspended particles. How to fix it: Shake your oat milk bottle vigorously for 10-15 seconds before each use to redistribute oat particles evenly throughout the liquid.
Variations and Substitutions
Customize your homemade vanilla oat milk with these creative variations and ingredient swaps.
| Ingredient | Substitution | Impact on Flavor |
|---|---|---|
| Pure Vanilla Extract | Split vanilla bean with seeds scraped out | Creates more complex, aromatic vanilla profile with visible specks for visual appeal |
| Maple Syrup | Coconut sugar or brown sugar | Brown sugar adds slight molasses notes; coconut sugar provides caramel undertones |
| Sea Salt (pinch) | Himalayan pink salt | Adds subtle mineral complexity and enhances vanilla perception on the palate |
| Rolled Oats | Steel-cut oats (blend longer) | Creates denser, chewier mouthfeel; requires extended blending time of 2-3 minutes |
| Filtered Water | Coconut water | Introduces subtle tropical sweetness and additional electrolytes while maintaining creaminess |
| Plain Homemade Oat Milk | Add 1 tablespoon unsweetened cocoa powder | Creates chocolate vanilla oat milk with rich, dessert-like flavor profile |
| Pure Vanilla Extract | 1 teaspoon almond extract mixed with vanilla | Adds nutty complexity that complements vanilla beautifully without overpowering |
| No Sweetener Added | Add 1 tablespoon honey or date paste | Creates naturally sweeter version with deeper color and richer mouthfeel |
Serving Suggestions and Pairings
Homemade vanilla oat milk shines in numerous applications beyond simple breakfast cereals and hot beverages.
Morning Coffee and Lattes: Pour your chilled homemade vanilla oat milk into hot coffee or espresso to create creamy, café-quality lattes. The vanilla notes complement both dark roasts and lighter coffees perfectly. Steam your oat milk gently for 45 seconds if you prefer warm milk in your beverage. Visit our collection of breakfast recipes for more morning inspiration.
Breakfast Bowls: Pour homemade vanilla oat milk over granola, muesli, or cold cereal for a creamy, satisfying breakfast bowl. The subtle sweetness and vanilla aroma enhance the flavors of fresh berries, nuts, and whole grains. Create parfait layers with yogurt alternatives for visual appeal and textural variety.
Smoothie Base: Use homemade vanilla oat milk as your liquid foundation for protein smoothies, green smoothies, or tropical fruit blends. The creamy texture and vanilla notes enhance fruit flavors while adding natural body and richness. Blend with frozen bananas, berries, and nut butters for complete breakfast nutrition.
Baking Applications: Substitute homemade vanilla oat milk in recipes calling for regular milk or dairy-free milk alternatives. Use it in muffins, pancakes, quick breads, and cake batters. The vanilla notes add subtle flavor enhancement without requiring additional extract in your baked goods.
Dessert Preparations: Create creamy puddings, custards, and ice cream bases using homemade vanilla oat milk. The natural sweetness and vanilla flavor create luxurious desserts without excessive added sugar. Whisk with cornstarch and a touch of maple syrup for silky vanilla pudding.
Protein Shakes: Combine homemade vanilla oat milk with protein powder, nut butters, and frozen fruit for post-workout nutrition. The complete amino acid profile from oats combines with your chosen protein source to support muscle recovery and satiety.
Afternoon Beverages: Heat your homemade vanilla oat milk gently with a touch of cinnamon for a cozy afternoon drink. Pour over ice with vanilla extract and a hint of maple syrup for a refreshing cold beverage. Enjoy as a soothing bedtime drink without caffeine-related sleep disruption.
Storage and Reheating
Proper storage ensures your homemade vanilla oat milk remains fresh, creamy, and delicious throughout its shelf life.
| Method | Duration | Instructions |
|---|---|---|
| Refrigerator Storage | 5-7 days | Pour homemade vanilla oat milk into airtight glass bottles or jars. Store on a middle shelf, not on the door where temperature fluctuates. Shake vigorously before each use to redistribute any separated particles. |
| Freezer Storage | Up to 3 months | Leave one inch of headspace in freezer-safe containers to allow for expansion. Thaw overnight in the refrigerator. Shake well after thawing, as separation accelerates in frozen oat milk. |
| Warming for Coffee | Immediate consumption | Heat homemade vanilla oat milk gently in a small saucepan over medium heat for 1-2 minutes, stirring frequently. Alternatively, microwave in a microwave-safe mug for 30-45 seconds until steaming. Avoid boiling, which causes curdling. |
| Stovetop Heating | 1-2 minutes | Pour desired amount into saucepan and heat over medium-low heat, stirring occasionally. Watch carefully to prevent scorching on the bottom. Remove just before boiling for optimal creaminess and mouthfeel. |
| Microwave Heating | 30-60 seconds | Pour into microwave-safe container and heat in 15-second intervals, stirring between each interval. Check temperature carefully, as microwaves heat unevenly. Excessive heat damages the delicate vanilla flavor. |
| Steam Wand (Espresso Machine) | 45-60 seconds | Position steam wand just below the surface of homemade vanilla oat milk to incorporate air and create microfoam. Angle the pitcher to create a whirlpool effect. Tap the pitcher gently to remove large bubbles. |
Signs that your homemade vanilla oat milk has spoiled include sour smell, chunky or curdled appearance beyond normal separation, or unusual sour taste. Discard any batch showing these indicators immediately.
Frequently Asked Questions
Can I use steel-cut oats instead of rolled oats for homemade vanilla oat milk?
Yes, you can use steel-cut oats to make homemade vanilla oat milk, though they require substantially longer blending time. Steel-cut oats are less processed than rolled oats, so they need three to four minutes of high-speed blending instead of the typical 60-90 seconds to achieve creamy texture. The resulting oat milk will have a slightly denser, more robust mouthfeel with pronounced oat flavor compared to traditional rolled oat versions. Start with a 1:4 ratio of steel-cut oats to water and adjust water content based on desired creaminess.
How much homemade vanilla oat milk should I make at one time?
Make approximately four cups (one liter) of homemade vanilla oat milk at a time using the standard recipe proportions, which represent the optimal batch size for most high-speed blenders. This quantity provides enough milk for 3-4 days of regular consumption while remaining manageable in your refrigerator without taking excessive space. You can easily double the recipe by using two cups of oats and eight cups of water if you prefer less frequent preparation. Single servings require proportionally smaller quantities: use one-quarter cup oats with one cup water for an 8-ounce serving.
Can I make homemade vanilla oat milk without straining it?
You can consume unstrainedoat milk, though the texture becomes thicker and more pudding-like than traditional creamy homemade vanilla oat milk. Unstrainedversions contain all the fiber and oat pulp, making them substantially more filling and nutritionally dense. The grittier texture may feel uncomfortable in coffee or on its own, so most people prefer straining for beverage applications. Use unstrainedoat milk specifically for smoothies, baking, or oatmeal toppings where thicker consistency provides benefits rather than drawbacks.
Can I make homemade vanilla oat milk with quick oats?
You can technically make homemade vanilla oat milk with quick oats, but results will be less satisfactory than using rolled oats. Quick oats are pre-cooked and broken into smaller pieces, causing them to absorb excess moisture and become paste-like rather than creamy. The resulting beverage will taste gummy and lack the smooth mouthfeel characteristic of quality homemade vanilla oat milk. For best results, stick with old-fashioned rolled oats specifically labeled as such, which provide superior texture and flavor to quick or instant varieties.
How do I make homemade vanilla oat milk less thick or more watery?
Reduce the amount of oats or increase your water quantity to achieve thinner homemade vanilla oat milk. Try using 0.75 cups of oats with four cups of water instead of the standard 1:4 ratio. Alternatively, add an extra 0.5 to one cup of filtered water after blending but before straining to achieve your desired consistency. Start with small adjustments in increments of 0.25 cups of water and taste test to prevent making your oat milk too thin. Remember that natural separation occurs during refrigeration, so your milk will separate somewhat regardless of initial thickness.
Conclusion
Creating homemade vanilla oat milk transforms your breakfast routine while delivering superior flavor, nutrition, and cost savings compared to commercial alternatives. This five-minute recipe requires just five basic ingredients and minimal equipment, making it accessible for any home cook regardless of experience level. Following the expert tips and techniques outlined ensures perfectly creamy results every single time. Your commitment to homemade vanilla oat milk creation means enjoying pure, additive-free nutrition while reducing packaging waste. Start making your first batch today and discover why homemade vanilla oat milk has become the preferred choice for health-conscious families everywhere.
For additional drinks inspiration and creative oat-based recipes, explore our comprehensive drinks recipes collection. Connect with our recipe community and discover new ideas by following us on Pinterest for fresh content and visual inspiration.